Categories:
__________________________________________________________

Sunday, October 31, 2010

Worm Bin 2 Update: Increase in Population

Worm bin 2 is a simple, small, rectangular container with a couple of holes on the lid (none at the bottom).  I used the bin at the start of October when I placed 7-8 worms.   Amazingly enough, by October 13, there were already 15 worms in the bin.  As of October 29, I counted about 36 worms already!  Granted, a lot of them were still babies, it's still cool, right? I took a couple of pictures.  My worms look like Jollibee Spaghetti!

But have they been doing their job?  Well, they're still not enough to process the worm bin contents fast enough (like within a month).   Keep in mind that most websites or blogs talk about getting a pound of worms.  I believe that's about 200+ worms.   So this bin is still about 1/5 of the norm.  Nonetheless, if you look at the contents, apart from the paper, it's hard to recognize anything at all.  So we can say that there's noticeable decomposition going on. 

The latest development on this bin is that I pushed all the old contents to one side (one half of the bin).  That includes all the worms.  Since there's no division, I created a used paper towel wall.  I stacked them in the middle.  On the other side, I put in fresh bedding and shredded leaves.  Once the material on the "old" side looks processed, I'm hoping to see some worm migration to the other side. By that time too, I'll stop wetting the "old" side to further encourage the worm migration. 

Wait and see...


Thursday, October 28, 2010

Indoor Compost Container / Vermicompost Bin

I'm a big fan of recycling and I'm absolutely thrilled with the concept of composting.  So you may ask, how do you get this old and not be practicing it?  Well, I think I know one person who practices composting.   It's not exactly popular in these parts.  I do have vague memories of digging compost pits in high school, but the exercise didn't ingrain the importance of it.  I just remembered the manure and it grossed me out.

Anyway, I've been fiddling around with composting worms the past few months.  I've got a couple of containers with different set-ups but not really a whole lot of worms since I just bought 250 grams (including substrate) about three months ago.  Unlike my manure exercise back in high school, I found vermicomposting very exciting because it gives me a chance to utilize kitchen scraps and yard waste.  That's great on a micro level.  But it also intrigued my imagination because it can positively impact the country's garbage situation.  And so I was immediately hooked.

This brings me to my topic for today.  I want to be able to utilize all my kitchen scraps, but I will surely get at least one objection to bringing worms into the house.  Thus, instead of an indoor worm composting bin, I will just use it as a composting bin (without the worms). Once it's full, I'll move it outside and introduce the worms.  I think it'll also give the greens a chance to lose some heat before I add the worms.  I've heard that decomposing stuff can generate heat enough to kill worms.

That said, this is how I created this indoor compost container / vermicompost bin.

I used an old 5-gallon round water container.  I have lots of those since I sell alkaline water (free plug). It was actually leaking already and resisted our various attempts to seal it.  I sawed it near the top using my high school vintage hacksaw.   Unfortunately, my hacksaw wasn't very cooperative.  The rusted blade snapped.  So I went to a local hardware store (Circle C) to get a blade, but they didn't have any.  I decided to get an entirely new saw.  The new one's called a drywall saw, although I'm not sure what that is.   The saw packaging included a warning that the saw was very sharp.

Once home, I started cutting through the container again.  You won't believe how tough that PET container was.  Flashback a few weeks ago. I was trying to put a hole into a small pot by stabbing the bottom with an icepick.  My aim slipped and I ended up stabbing my left forefinger.  It bled intermittently for several days and was swollen for over a week.  Back to the present, while sawing finishing touches into the 5-gallon container, I ended up sawing the same injured finger!  I guess that settles it.  I am no handyman. 


Wednesday, October 27, 2010

Herb Trading


Did you ever think there was a market for herb bartering?  Until a couple of weeks ago, I didn't know.  As I've often talked about, my Cinnamon Basil plants are thriving in my garden.  From one original pot, I now have about 40-50 (including the ones I've given away).  Is that amazing or what?  Not wanting too much of a good thing, I posted an offer to swap herbs in a local gardening mailing list.  For my cinnamon, I'd want Rosemary, Lavender, Dill, Sage, and some others.  Amazingly enough, I received two responses within the week.  The first one mailed me Rosemary seeds (and Sage I think...I'll look at her pack again).  She didn't even ask for anything in return. But since my Cinnamon Basil plants are flowering, I figure I'll give her a couple of seed pods (if I ever find out how to harvest the seeds). 

The other one traded Dill and some type of Oregano for six cinnamon basil plants.  In fact, I even threw in about a dozen rooted cuttings (not planted yet).  I was running out of pots anyway.   If you look at the Dill above, you'll see that it's really big already.  I haven't figured out how to use it, but my initial readings tell me it's good with butter.  The amazing thing about Dill that I've observed is that t really follows the sun.  Like, it will bend towards the sun within a day.

As for the Oregano, well it smells like my Cuban Oregano, but the leaves are a little different.  They're outlined in white.  The other one on the very left, I'm not even sure what that is.  Maybe it's an Oregano too.   I'll do my research in the coming weeks.

In the meanwhile, if anyone else wants to trade, buzz me.  I still have lots of Cinnamon Basil and Cat's Whiskers.


Monday, October 25, 2010

Vermiculture Experiment: Do Worms Like Coffee Grounds?

In most How To articles that I've read, I always find that coffee grounds is always on the list of Stuff to Feed Worms.  Well that makes sense I suppose.  Everyone likes Starbucks.  Why shouldn't worms?  Naturally I had to do a little experiment.  I got some months old coffee grounds from the trunk of my car (I've been using it as an air freshener), got a small plastic lid and placed some coffee grounds there.  I added a little water for moisture and placed it in my worm bin.

Why didn't I just pour it in to the bin?  For one, it's hard to distinguish coffee grounds from dirt once they're all mixed in.  Besides, isn't vermicast black as well?  I wanted to make it more dramatic.  Will worms actually take the time to climb over the lid to get the coffee grounds?  Will there be evidence of a massive caffeine burst in the bin?  Will they finish the contents of that little lid?  We'll find out.  I actually cheated a little and put 2-3 worms inside the lid.  I figured if they enjoyed it, they might call their friends.  You never know. 

But as luck would have it, one of the worms died inside the lid.  Must have gotten a massive heart attack.  I'll try decaf grounds next time.  A few days later, the coffee grounds was still untouched.  Tsk.  Sometimes these worms make me feel under appreciated.  And so I figured coffee grounds must not be in the list of favorite worm treats.  I just poured the contents of the lid inside the worm bin.  I'm sure they'll eat it, but obviously they weren't thrilled like I thought they'd be.  Maybe next time I'll do a variation of that experiment. I'll put pan de sal with the coffee grounds.

Sunday, October 24, 2010

Aluminum Side To Maximize Plant Sunlight

There are certain kinds of herbs that just won't thrive in my garden.   What's common with Oregano Thyme, Lavender and Rosemary?  These are supposedly the low maintenance plants that you should just leave in one corner of your garden.  Just ignore them and they will thrive or so they say.   These are plots that love hot and dry conditions.  Unfortunately, it's the rainy season.  I try to compensate by hardly watering my Lavender and Rosemary (my Oregano Thyme has since moved on to a better place), but I want to do more for them.

I got two ideas while reading up on sunlight maximization: an aluminum siding and aluminum mulch.  Hey, that's something even I can do.  I also read that it balances the light source.  Otherwise, the plant will bend and grow towards the sun (oh I see that a lot!) So I finished my cereal, got the aluminum inner container and I taped two chopsticks on each side.  Then I plugged those by the side of the pot.   It's harder to describe than I though, so just look at the pictures.  ;-) Hopefully, the reflective surface will provide my plants with a lot more sunlight.

I've also been eating Chocolate Mallows which have aluminum wrappers.  I shredded those and used those for my lavender mulch.   In keeping with my recycling thrust, I also kept the cereal box for future bedding of my worm bins.


Friday, October 22, 2010

Vermiculture: Learning by Experimenting

Well, I've been trying to get some shred of evidence that worms are the voracious eaters that they're reputed to be.  An important tidbit that I've read is that worms don't really eat the food you give them.  They don't have teeth, but they do have a gizzard.  They thus suck parts of rotted organic material to be grounded by the gizzard.  But, they actually get their nutrition from the microbes (bacteria, fungi, protozoa..etc) in the rotting material.

That said, for worms to eat faster, the organic material must have been broken down somewhat already.  That's why it helps to chop the fruit rinds and vegetable scraps before feeding your worms.  I also read that it helps to freeze the materials overnight.  This helps with cellular breakdown, making your organic leftovers more worm-friendly.    I did that too.  I placed the chopped up leaves (mostly herbs) and crushed eggshells in a zip locked bag and I placed it in the freezer overnight.   Afterwards, I thawed it and placed it inside my worm bins.

Finally, I've also read that you should put food scraps in the worm bin according to sections.  Feed on one side first, and then on another.  Apparently, if you feed all around, the process of decomposition would cause the bin to heat up all around, which could be hazardous to your worms.  So I tried that too.  As you would see, both worm bins 2 and 3 were fed by sections.


All in the name of making my worms eat faster.    Well to date, there has been no evidence that the worms liked what I did.  But then again, I have to keep reminding myself that I have to be patient because I only used a handful of worms in these two bins.  I don't think they'll be churning out substantial amounts of vermicompost anytime soon.  Sigh.


Thursday, October 21, 2010

Baked Potato

Let me start of by saying that the Nokia E51 doesn't have a very good camera.  That's why a lot of my shots are out of focus, especially when I attempt close-up shots.  That said, I had a novel thought about eating baked potato last weekend.  And so that's what happened.  From my last potato adventure with Jean, we found that it was heard to spread stuff on potato quarters.  So this time around, we just used halves.

So what's this creation about.  Well, before I tell you, let me just say that it tasted awesome (at least for me).  I guess that brings my good to bad ratio of cooking experiments to about 50%. 

First we boiled the halved potatoes (with holes stabbed into them) for about 10-15 minutes.  The last time, we didn't boil long enough so it took a lot more time to bake.   This time around, we made sure the potato was almost ready to eat before baking.  I also added salt while boiling to give it more flavor.

Then I chopped up some fresh sweet basil leaves from the garden.   The picture here is one of my contributing plants. Can you believe this was probably about 5-inches tall two months ago?  It was just supposed to be a companion plant for my white rose (which I think is now dead).  Then one day I just noticed that it's my biggest sweet basil plant in the garden.  But I digress.

I mixed the sweet basil with some shredded cheese (Quick Melt) and I also added some Parmesan cheese.  I put in some Olive oil, ground pepper, salt, a few cloves of garlic, some chopped Maple Bacon (you've got to try that!)  and probably some other herbs.  But my favorite addition was Cayenne Pepper powder.  Initially I just put in a dash, but then I decided to be a little happier with it since I like my food spicy anyway.   After mixing all those in, we spread that on the potato halves and baked at about 350 for about 15 minutes (all estimates since I wasn't paying attention to the time or the temp). 

We served it once it looked and smelled ready.  It was amazing!  Not bad, right?  Next time, maybe I'll talk about my Minestrone Soup. 


Tuesday, October 19, 2010

Will Worms Eat Moss?

As I mentioned in the previous worm entry, I haven't seen a lot of material about worms eating moss.  It is microscopic, so maybe it fits in the diet.  As far as Internet entries are concerned, I didn't really find anything conclusive.  To me, that's a signal to experiment.  So that's what I did.  I decided to experiment with worm bin 1 since most of my African Night Crawlers are still there (it's my main vermicompost bin).  From my constant fiddling with the contents, I'd say that it's probably 60% processed.  Using my trusty trowel, I scraped off some moss sheets from our garden and placed them on top of the pile.  Those would be the predominantly light green parts you see at the bottom of the picture.

I then covered the moss with some bedding.  When I started this bin, I put in whole newspapers (no shredding).  That's why I still have a lot of those.  It just looks black because it's been mixed in when the contents for a long time, but make no doubt about it.  There's a lot of paper on top of the moss.   Would it take a day?  A week?  Would the worms try a mass exodus if they don't like moss?

Only time will tell.  After covering the moss with chunks of semi-decomposed newspaper, I covered everything with a whole page of a newspaper.  My only purpose though is to make sure light doesn't come in.  Anyway, after two days, the results are inconclusive.  I think the moss sheets have been halved, but I can't be sure.  And, I did find a lot of what seemed to be worm castings just beside the moss sheets.  For now, I will go with the thought that my worms ate the moss.  In fact, I put in a couple more sheets today in another part of the bin.   Let's see again in a couple of days.

How about you?  Do your worms eat moss?


Monday, October 18, 2010

Lavender Recovery

I used to have a fair sized lavender plant (several actually in one pot).  But sometime in the middle of the year, they all started getting discolored as if drying up.  I've long suspected it was some sort of fungus or root rot.  So with only two main plants left, I moved my lavender back to a small pot and put in some very good organic soil.  Unfortunately, one still died.   But not, after what seems like 5-6 months of rehabilitation, it looks like my little lavender is back.  If you look at the leaves, they seem to be healthy again.  I don't see any of the brown wilted leaves near the bottom.  And (you won't see it here), I've also seen new growth in the lower branches.  Yey!  Maybe in a couple of months, I'll transfer this again.  Meanwhile, this little survivor will remain in the hottest part of my garden and will continue to get very minimal water.   If it wants hot and dry, that's what I'll give it.  Let me just say, for an herb that you can supposedly very low maintenance, it required so much attention!


Sunday, October 17, 2010

Mint Epidemic

Oh man!  Almost all my mints (Japanese Mint, Chocolate Mint, Lemon Mint, Peppermint and Swiss Mint) are sick across the garden.  Well almost all of them.  My Spearmint (which recently got a vermicompost boost) seems to be the only healthy one.  I think there are two problems.  First of all, the lower leaves of my various mints are drying up.  I'm not certain if it's mint rust.  It looks a little like that.  I'm not sure if it's fungus either.  Early this week, I moved most of my mints to the sunniest part of the garden.  Maybe it'll help dry the soil (I was also wondering if it's root rot).   I just know that my plants generally perform better when out in the full sun.

Here's the other problem.  I think there's a caterpillar infestation again.  They're eating all the mint leaves!  I don't get it though.  How come they're not attacking the Cat's Whiskers.  Among my basil plants, they're attacking the Sweet Basil a lot more than my Cinnamon Basil plants. Anyway, most of my mints (no matter how big) have been stripped clean of leaves!  Argh!!!  It's irritating.   I hope most of them survive this episode.  Sigh.


Saturday, October 16, 2010

Worm Bin 3 Update: Missing Worms

Here's an update on my stackable worm bins experiment.  When I started using this tray for my vermicomposting activities, I taped around the sides so that most of the holes are covered.  I made sure though that there's still plenty of small holes for ventilation.  So I put in 7-8 African Night Crawlers because I wanted to see how fast the worm population will grow.  When I did my worm count last night, I just found 5-6.  I can't really tell from this picture anymore. That means I have about two missing worms.  Rats.  But no, Jean, they won't come out of the shower. Anyway, I hope they start mating soon.  They all seem to be of age.  I've been pretty feed-happy with this worm tray;  I think I've given it three layers of pruned leaves (mostly herbs), one spoiled banana and two layers of crushed eggshells.  Doesn't seem like a lot, but I just have 5-6 worms!  It's a virtual non-stop buffet.

Compared to my two other bins, I would have to say decomposition here is pretty fast (even without worm action).  When I mixed up the contents, I didn't see a lot of greens.   Considering that it looked like this just a week ago, I'd say that's pretty good.  The aeration of the bin by virtue of the holes at the bottom and no lid on top (I just put newspaper on top) necessitates that I spray the tray with a little water at least once a day.  Imagine that.   Normally, I just water the other bins twice a week.  And it's not even like the water drains below.  The "catch basin" newspaper below is dry whenever I check it.  That said, I'm also wondering if the worm tray gets really hot because of the rapid decomposition and the fact that the tray may not meet the moisture requirement.  Maybe that's why the worms are not multiplying.  Next time I feed it though. I'll just put all the food on one side of the bin, so the other side is left cool.  And I'll add more damp bedding so there's more moisture to hold in.


Friday, October 15, 2010

Habanero Update

Four months ago, I introduced the Jalapeño to my stable of plants.   Apparently, it was a Habanero.  No big deal, right?  Both have Mexican sounding names.  Until you taste it.  You know, I'm a big Siling Labuyo fan. On my happy trips to Chicken Bacolod, I always use about 3-5 pieces of Siling Labuyo for my sauce.  Pretty hot.   Siling Labuyo rates about 50,000-100,000 in the Scoville scale.  However, Habanero rates 100,000-350,000.  Case in point, I was eating Sinigang na Baboy last week. I put one crushed (pinatay na sili) Habanero in my patis sauce.  Oh my mouth was burning for about half an hour with one Habanero!  I was eating sweets and drinking water for the whole half hour after feeling the burn.  And yet, it still didn't go away. That's a Habanero for you.


Some Worm Thoughts

I've been doing a lot of reading and thinking about, as well as experimenting with worm composting bins.   It's exciting!  The last time, I segregated all the worms in worm bin 2 and moved almost all bedding and food to another side, leaving the worms with little food and bedding.  I also poured a generous amount of crushed egg shells.  Did the poor worms die as I feared?  Nope.  Early this morning, I checked on them.  None of the worms remained there.  They all migrated to the other side of the bin where I left about 98% of the bedding and food.  But the great thing is that they were all alive.

I've been wondering about two other things: molds and moss.  One of these days, I will experiment on feeding molds and moss to my worm bins.  Let's see what sort of vermicast they produce then (probably the same).  You know what makes this an interesting experiment for me?  There's very little information on the Internet on worms eating molds and moss or even basic composting both.  And that's why I have to see it for myself.


Wednesday, October 13, 2010

Wom Bin 2 Population Update

Worm Bin 2 
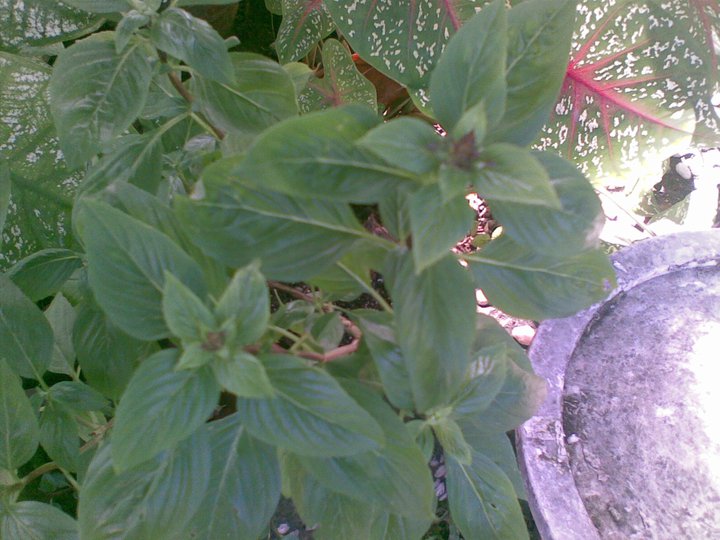
is about 3 weeks old.   When I prepared it, I put in about 7-8 worms in the bin.  Pretty small number, right?  Well I just wanted to see if I can make that population grow.  Since I was still really excited then, I fed those worms a lot of big pieces: whole bills, whole weeds, and stems with lots of leaves (mostly basil and malunggay).  You can see that in the picture.   Actually, when I checked earlier, I didn't find that many leaves.  Wow, maybe they were being eaten after all.  I say that because probably like all new vermicomposters, I think my worms are eating too slowly.  But then again, I did just put in 7-8 worms.  The mass of the small bin's contents is probably 30x more than the worms, so yeah, maybe it'll take them time to finish.

Anyway, I couldn't contain my curiosity earlier and did a worm count.  It's a small bin so it can be done.  I moved each piece slowly until one side just had worms.  Guess what?  I had about 15 worms there (including a couple of babies).  Not bad.  That's like a 100% improvement in three weeks.  ;-) I can't wait for next month!

Just for fun, I moved all the bedding and the food on one side of the container.  I left the worms with a little bedding and leaves and then I added a lot of crushed eggshells (for grit, or so I've read).  I'll check if they're still alive tomorrow.  I'm afraid the crushed eggshells might feel like broken glass.  Imagine slithering on broken glass.  But hey, maybe worms are different.  We'll see.

As an oddity though, you'd find that the most common term you'll read when describing the ideal bedding is "wrung-out sponge".  I don't know why.  I think people are too liberal when lifting from the net.  Anyway, the weird thing is that I kept spraying the bed (there were ants outside and I wanted to discourage them from entering the bin) and the water kept sliding down one side (I don't know...uneven flooring probably).  Now I didn't have drainage so the moisture was collecting.   Guess where I found most of the worms?  In the wettest part of the bin.  The bedding there had certainly more water than a "wrong-out sponge", but hey, if they like it there, I'll keep wetting it for them.   What's your experience in this regard? 


Tuesday, October 12, 2010

Harvesting Vermicompost


Curiosity finally got the better of me (yet again).  I know my worm bin 1 is not quite finished (about 60% processed), but I just had to experience harvesting worm castings.  So, I borrowed one of the unused trays from worm bin 3.  I had two reasons for buying those trays: 1) I wanted to try a flow-through bin; and 2) I wanted a sifter.  I figured, the holes at the bottom of this tray are small enough.  It might get a few unprocessed materials, but hey, as long as it's largely vermicompost, I'll be happy.

And so I started getting chunks of material from my pail and pouring them into the tray.  I shook the tray gently and true enough, material fell through the little holes.  Whatever didn't go through the sifter, I just put aside and placed back in the bin afterwards.  I did this about 4-5 times.   I wasn't really trying to finish the contents of the bin, after all.   I just wanted to get enough worm castings to fertilize one lucky plant.  As you can see from the picture, it wasn't really much.

Now the process itself wasn't really as smooth as I described.  In the course of my shaking, I naturally put in a good number of worms in the sifter.  I bet they got dizzy with the process!   As you can see from the picture, there's a couple of those wrigglers on the tray.  If you look close, you'll also see that the worms can easily fit into the holes.  And that's exactly what happened.  The worms (big and small) went down with the castings.  Argh.  So I had to use my trusty new portable garden fork to pick them up (about 20 or so) and put them back in the bin (still dizzy).

And that's that.  After a ton of sweat (it was really hot and humid), it was time to put the castings in a pot.  Which plant was the lucky recipient?  It was this small Spearmint.  Why?  It's the only Spearmint in my garden and it has been stunted for months!  I'm happy it has survived all this time, but I'd like to propagate this too.  And just to add to the odds, the mother plant (this was given to me as a cutting) died already.  I also can't find Spearmint in any seedling garden.

Well let's see how effective the worm poo is and if it can help my little Spearmint defy the odds. Watch out for that update!


Publish Post

Monday, October 11, 2010

Welcome New Plants

Well I admit.  I've been writing about my worms too much that I haven't written about other new denizens in the garden.  Today, let's do a little introduction. First of is an Okra (Abelmoschus esculentus Moench) which Jean raised from seed.  It supposedly only started growing rapidly once it reached my sunny front yard.  Well hello Mr.Okra.  I am sorry to say that I don't eat you.   So keep growing, but you won't be my favorite anytime soon.  ;-)

And then, there's also a Kangkong (Ipomoea aquatica).  Now this is a different story.  Jean also raised this from seed and it also started thriving in my front yard.  However, the difference is that I eat Kangkong.  I like adobong kangkong with lots of siling labuyo or kangkong in Sinigang na Baboy.   But here's the problem.  I just have one plant.  It's hardly worth it to cook one stalk, after all.  Hmmm...maybe I should plant more kangkong seeds.
Third on the list is a Marigold (Calendula officinalis).  It's probably currently a famous plant because you need it to get sunshine in Plants vs. Zombies.   This is another Jean baby (are you noticing a trend in the plants I don't pay attention to....hehehe).  I recently repotted it (into a bigger one) because I hear this can be a big plant! Now unless there are real zombies in my garden, I'm not sure what use I'll have for this plant.  My personal philosophy now is to only plant and grow things that I can eventually eat.  We'll see.

Finally, there's a Tarragon.  I actually had Tarragon cuttings months before but none of them survived the rooting process.   I bought my big Tarragon plant in Tagaytay.  It was a tad overpriced, but hey.   I couldn't find it elsewhere.  And so I bought one.  Now, what you see in the picture is not what I bought.  These are from my recent cuttings.  See how big they've become.  Yeah, they look like grass, but they smell like rootbeer.  And I've tried dried Tarragon in my salad and  in my minestrone (another story) and it's alright.  I've yet to try my own plant, but I'll get there.    And there you go.  Say hi to my new plants!


Worm Bin 3 Update: Castings

In worm bin 3, I had hoped to apply the quick lessons I've learned from my other relatively new bins.  As I mentioned before, worm bin 3 is designed to be a stackable, flow-through bin.  I also mentioned that while I have been quite generous with my feeding, I'm certain my worms are still okay.   I haven't seen my worms since I placed them there since I haven't been digging around this bin, but this is what I saw underneath.  I think those are worm castings!  Enlarge the picture and see for yourself.  What's cool too is that when I shake the bin, the castings just fall through the holes in the bottom of the bin or tray.  Of course there are some egg shells that fell too, but otherwise, most of the material is black.   Just for fun though, I placed everything back on top.  After all, worm castings are supposed to have beneficial microbes.  If I can spread those in the bin, then great.

Meanwhile, let me talk about my overfeeding.  For most part, I feed my worms pruned herb leaves and weeds.  Lately, I've tried submerging the leaves in water for about two days.  It softens the leaves a lot (like spoiled vegetables).  And since worms don't have teeth (they just suck their food), it'll help them if the food is soft.   True enough when I got the leaves from the cup with water, there was definitely a light aroma of something decomposing.  ;-)  I cut up the leaves and spread them around the tray.  Afterwards, I just covered them with a dry bedding of shredded bills and receipts.  I didn't add further moisture since the leaves were soaking wet as is.  Well that's about it for the update.  Although I don't see my 7-8 worms down there, I hope they're having a feast!


Saturday, October 09, 2010

Growing, Caring for and Propagating Oregano

I have two types of Oregano.  The first one I got is the Cuban Oregano.  Interestingly enough, you usually find this in empty lots (like weeds), untended and growing like crazy.  That's where I got mine.  I crudely cut a couple of stems from some vacant lots and placed them in a glass of water.  The funny thing about this particular plant (the one in the picture) is that is rooted in a small container of water.  But then as it grew, the stem came into contact with the soil.  In time I just threw away the water in the container since the plant already rooted itself to the ground!  So true to its reputation, the Cuban Oregano is extremely hardy.   It's supposed to taste a little like sage or thyme but I don't know.  I haven't tasted it yet.
Now I also have one that's called an Italian Oregano.   The leaves are much smaller, but the scent is the same.  This is what you use for Italian dishes, naturally.  Now I've had this plant for over two months I think.  Since that time, it has probably grown 1 cm.  Slow huh?  Considering that it had good draining soil and was located in a prime high sun spot, I've been puzzled.  So I figured maybe it was just crowded (there being six plants in one small pot).  I divided the group of plants into two pots and separated the two pots.  Well, both are still fairly stagnant.  Man, they don't grow at all.   And it's not like they look all sprightly.  This sort of non-responsiveness drove me to do a little research.  And here's what I found out about Italian Oregano.

Sunlight:  Full
Soil:  Good drainage
Growth: Can spread but slowly.  Can grow up to 18 inches tall.  It grows very slowly.
Propagation: Division, Cuttings
Use:  As a spice.  Tastes better after it has flowered.  Also used to relieve children's cough.  Stimulates the appetite.
Other: Cut it back after flowering.  Expect new growth coming from the base.

Friday, October 08, 2010

Worm Bin Updates

Hello fellow vermicomposting enthusiasts! I can hardly wait to provide an update on my worms.  That's me and my addictions.  Anyway, let's first look at worm bin one: the pail.  As you can see, there's a lot of uncomposted material, but the ratio vs. composted one is probably 40:60.   I've stopped feeding this bin for a week now.  I only add water and I mix up the stuff for aeration (and of course to see my little African Night Crawlers in action).    In the past few days though, this bin has had some adventures.   The other day, I saw a couple of ants inside.  I panicked because I've seen how ants attack lost worms in my backyard.  I added some water to discourage the ants from hanging around any longer.  So that's that.   Yesterday afternoon, when I opened the bin, I was shocked.  There were like 6-7 worms all hanging out on the sides, trying to get out.  That's a first.  I've read that when your worms try to escape at the same time, something's very wrong.   You know what?  I felt the air inside the bin.  It was really warm!  And it came to me.  The 34 degrees Celsius day really heated everything in sight.  My hydrangea wilted (again).  My basil plants wilted.  And now, my worm bin's like a sauna.  And so I left the lid open for a while and used my trusty garden fork to move around some material for better aeration.  I checked again this morning.  Everything's fine again.

Thursday, October 07, 2010

Herbs Are Flowering

About a month ago, I successfully propagated my Stevia.  It was fairly simple.  I just cut a couple of long branches, placed the cuttings in water, put the cup in an area with some sun and waited for about a week and a half.  Voila!  They all rooted.    The first time I tried rooting Stevia cuttings, it didn't work.  I think it's because my mother plant wasn't healthy enough when I did it.  Anyway, after the cuttings rooted, I planted them in a grande plastic cup using grade A organic soil (excellent drainage!)  Guess what?  Within a month, the new plants have grown so much and have started to flower.  They're even healthier than the mother plants.  What's the difference?  The healthier ones are in the front yard where sunlight is abundant.   That said, I'm officially shooting down the advice I found that should be in partial shade.   Anyway, I've pinched off the Stevia flowers because I read that flowering takes away from the plant's sweetness.

As for my other herbs, a couple of my Thai Basil plants and Cinnamon Basil plants have also started flowering.  I was tempted not to pinch them off because I just wanted to experience letting an herb go to seed.  A day later, I pinched them off anyway.  I just won't let them die.  I've read that once an herb goes to seed, it generally dies.   Oh man, I have a lot of Cinnamon Basil plants now.  On another note, I'm looking to trade a couple of my Cinnamon Basil plants for other herbs.  I'm looking for Parsley, Rosemary, Lavender, Dill and Sage.   Oh, I'm also looking for a Purple Basil.   Let's meet up in Quezon City!


Wednesday, October 06, 2010

Worm Bin 3: Flow Through System

In my recent addiction to vermicomposting, I must have watched over 50 videos and read over 50 blog entries for my research and entertainment.  I think I dream about composting worms in my sleep already.  Anyway, freaky behavior aside, I was intrigued by the can'o'worms contraption. Basically, it's a stack of flow-through trays or trays with little holes at the bottom.  It's supposed to let worms move from one tray to another; once they finish eating through one, they'll migrate to the other trays with more food sources.  Now, this system  goes on sale for about $105 or PHP4,600.   So I figured, hey, that's not so hard to replicate and shouldn't cost that much money.

So I bought three trays from Landmark and they're full of holes all over.   It cost me P120 or $2.75.  Well that's not so bad.  To make sure the worms don't escape, I used packing tape around the sides.  You won't see on the picture, but I actually left small holes on the sides: good enough for ventilation but a challenge for worms attempting to escape.  I also taped folded paper on the sides (all 4 sides) to make sure the trays don't get stacked tight.  Now the only way out for the worms is up or down.  Below the bottom tray, I put in a whole newspaper.  Since the bottom is flat, that basically takes care of escape routes from the bottom.   But it'll still have excellent drainage since a whole newspaper won't impede water flow. On top, I'll just place a another whole newspaper and that's it.  No more escape routes.  And yet, since everything's loose, there'll be enough air for the worms. 

So that's it.  I now have a makeshift multi-layer flow-through vermicompost bin.  Will it actually work?  For now it seems better designed than worm bins 1 and 2.  But, we'll see in a couple of weeks if it lives up to my expectations. 


Related Posts with Thumbnails