I haven't been able to give my worms their due attention in the past weeks since I've been rather busy. That said, my vermicomposting habits have changed somewhat. I no longer check on my bins several times a day. It's more like once a week now. But guess what? My worms are alright.
So how do I take care of my worms now? I collect our organic leftovers in a resealable bin. I add paper as necessary (when there's moisture under the lid) to keep the contents as dry as possible. At the end of the week, when the bin is full of nice, sour smelling contents, I dump the contents on several layers of whole newspaper sheets (about 3 to keep the dampness from getting through). Afterwards, I wrap the contents nice and tight and then I dump the newspaper package into one of my flow through trays.
I transfer about half of the contents of the tray to another tray since the tray contents go down by about half in a week so that my newspaper package has somewhere to go. I rarely add moisture now since it's been raining. The worms take care of migration on their own. That's about it. Zero organic waste with minimal effort.
Showing posts with label VERMICOMPOSTING. Show all posts
Showing posts with label VERMICOMPOSTING. Show all posts
Monday, October 03, 2011


Wednesday, July 06, 2011
Hydrangea Pot Vermicomposting
As I mentioned in a prior post, my mophead hydrangea plants are situated in front of my house. When I sweep the floor (filled with dust, hair, skin cells, dead insects), I promptly pour the contents as hydrangea mulch. I would partially the dirty mulch credit for the hydrangea's continued health. However, since I also throw some food scraps there (lemon, onion, other fruit peels), I've been seeing roaches much too frequently in the area, not to mention gnats. So I changed strategies. I covered the dirty mulch with lots of coffee grounds and paper scraps and put in a couple of African Nightcrawlers. Well this isn't my first try at pot vermicomposting, so I know this could work. I've also vermicomposted using what I call a reverse mulch technique with live plants on top (mango, cat's whiskers, habanero, etc). Anyway, I continued caring for the plant, not really paying too much attention to the mulch. I've thrown at least 20 roaches into that pot over the months so you'd understand why I don't want to touch it much. That was until today.
For the past couple of days (after over a month since the mulch), I've been noticing that the soil on the pot (yes, I can see soil already) seemed grainy. That's a good sign if you're used to seeing vermicompost. So today, I got my trusty trowel and snooped around. There were lots of worms and at least two inches of vermicompost on top. Not bad huh? The more you ignore them, the more they thrive. I'm pretty sure most of them were African Nightcrawlers and not earthworms. I can almost distinguish them physically now. And besides, they were lolling around organic matter. Earthworms tend to stay in soil, correct? Since I was running low on ANC inventory anyway, I gathered an ice cream container full of worms and vermicompost so I can easily fill an order for a worm bin. I also replaced the lost mass with about two handfulls of shredded paper along with a few scoops of used coffee grounds.
With my recent successes in pot vermicomposting, my thoughts have been wandering towrads my mom's absolutely large pots at the back. I am thinking about the possibilities.
Until next month!
For the past couple of days (after over a month since the mulch), I've been noticing that the soil on the pot (yes, I can see soil already) seemed grainy. That's a good sign if you're used to seeing vermicompost. So today, I got my trusty trowel and snooped around. There were lots of worms and at least two inches of vermicompost on top. Not bad huh? The more you ignore them, the more they thrive. I'm pretty sure most of them were African Nightcrawlers and not earthworms. I can almost distinguish them physically now. And besides, they were lolling around organic matter. Earthworms tend to stay in soil, correct? Since I was running low on ANC inventory anyway, I gathered an ice cream container full of worms and vermicompost so I can easily fill an order for a worm bin. I also replaced the lost mass with about two handfulls of shredded paper along with a few scoops of used coffee grounds.
With my recent successes in pot vermicomposting, my thoughts have been wandering towrads my mom's absolutely large pots at the back. I am thinking about the possibilities.
Until next month!
Monday, June 27, 2011
Overfeeding Your Bin Tip: Vermicomposting Adventures in Quezon City
One of the most common tips you'll see when vermicomposting is to avoid overfeeding your worms. Sounds familiar? It's bad for your bin because too much materials decompose at the same time, causing your bin to smell bad. At the same time, the decomposition will eat up the bin's oxygen, thereby depriving your worms. I've experienced that first hand.
Now, I never seem to have enough worms because people buy worm bins from me. However, I have managed to vermicompost every organic waste in the house. Here's one technique that has worked for me recently.
I put a week's worth of organic waste (with shredded paper of course) in my bin. That's a lot! I usually have to spread that out into several bins. Instead of doing that though, I just put the contents inside a paper bag (thank you Starbucks) or a small cardboard box (Nesvita, light bulbs, etc), I close or seal it and then I put that inside the bin. I don't bother to moisten the bag or box. After all, when the organic matter decomposes, it will release moisture. The worms eat from under the bag when the time is right. It's great because the bin doesn't smell or attract insects.
At one point, I had about 100 grams of worms left in a semi big bin (3x1x1.5 feet) because I scraped to provide a customer with his requirements. About two weeks later, I put in an entire melon (rinds only of course) inside a starbucks bag. They finished it and there was no smell at all. Cool huh? Just the other day, I also had a rotten melon (what a waste, right?). This time around, I placed the entire melon (not just the rinds) in a big paper bag, wrapped the bag around a little to close the hole and dumped it into the bin. I'm betting the worms will finish that in about two weeks. Once again, no smell.
Try it both ways. Get identical small bins with minimal worms. Put lots of food in both, but bag it in one. See if the technique works for you too. ;-)
Now, I never seem to have enough worms because people buy worm bins from me. However, I have managed to vermicompost every organic waste in the house. Here's one technique that has worked for me recently.
I put a week's worth of organic waste (with shredded paper of course) in my bin. That's a lot! I usually have to spread that out into several bins. Instead of doing that though, I just put the contents inside a paper bag (thank you Starbucks) or a small cardboard box (Nesvita, light bulbs, etc), I close or seal it and then I put that inside the bin. I don't bother to moisten the bag or box. After all, when the organic matter decomposes, it will release moisture. The worms eat from under the bag when the time is right. It's great because the bin doesn't smell or attract insects.
At one point, I had about 100 grams of worms left in a semi big bin (3x1x1.5 feet) because I scraped to provide a customer with his requirements. About two weeks later, I put in an entire melon (rinds only of course) inside a starbucks bag. They finished it and there was no smell at all. Cool huh? Just the other day, I also had a rotten melon (what a waste, right?). This time around, I placed the entire melon (not just the rinds) in a big paper bag, wrapped the bag around a little to close the hole and dumped it into the bin. I'm betting the worms will finish that in about two weeks. Once again, no smell.
Try it both ways. Get identical small bins with minimal worms. Put lots of food in both, but bag it in one. See if the technique works for you too. ;-)
Tuesday, June 21, 2011
Ideal Temperatures for African Nightcrawlers: Vermicomposting Adventures in Quezon City
I've observed something over the past couple of months. In April and May, I had to scoop back worms from the floor at least twice a day and I had to keep the night light on to discourage escape. Furthermore, I had to leave the lid off my bins even at night apart from not adding any sort of moisture at all. And yet, I still lost a lot of brave worms in those months. I salute them.
The past couple of weeks have been marvelous though. I've been adding food whenever I want. I pour glasses of water in my bins. Some are even flooded. I keep the lids on and I don't have to leave the lights on at night. The best part is that my worms stay put! And then there's the lack of fruit flies and gnats.
What's the basic difference? A couple of degrees in the temperature. Summer was brutal. We had days of 33-34 degrees. These days though, we get as low as 27-28.
What's the conclusion? African Nightcrawlers like low temps in the Philippines. They can tolerate higher, but the other conditions must be just right (excellent airflow and optimum moisture). It would seem that worms are more forgiving about air and moisture when temperatures are lower.
The past couple of weeks have been marvelous though. I've been adding food whenever I want. I pour glasses of water in my bins. Some are even flooded. I keep the lids on and I don't have to leave the lights on at night. The best part is that my worms stay put! And then there's the lack of fruit flies and gnats.
What's the basic difference? A couple of degrees in the temperature. Summer was brutal. We had days of 33-34 degrees. These days though, we get as low as 27-28.
What's the conclusion? African Nightcrawlers like low temps in the Philippines. They can tolerate higher, but the other conditions must be just right (excellent airflow and optimum moisture). It would seem that worms are more forgiving about air and moisture when temperatures are lower.
Friday, June 17, 2011
Vermicomposting in the Philippines: Multiple Tray Flow Through Worm Bin
 My really small back porch has been getting really crowded and messy because of all my little worm bins. And then I had an inspiration. I decided to have a multi-level flow through bin made out of office trays. Of course I've tried this before, but I only stacked two or three. This time around, I stacked five fully filled trays. That's lots of paper and stuff and very few worms (about 250 grams I would guess). Will it work? Perhaps.
Here are some "features" of this stacked contraption: I put four chopsticks through the holes of each tray. This prevents the trays from being too compressed. This way maximizes the air flow. Also to that end, I removed all the packing tape on the sides of the trays since I'm not afraid that the worms will try to escape. I'm also not afraid of the vermicompost spilling from the sides. That's because I also have a slightly wider bin at the bottom that will hopefully catch vermicompost falling from the sides. On top, I just cover the tray with a breathable eco-bag. And that's it.
It's just like an expensive worm factory, only much cheaper. The downside though is that the contraption is accessible. I've seen a cockroach and two lizards already. Really? Are those house lizards feasting on my worms? Tsk.
Saturday, June 11, 2011
Worm Bin With Mushrooms
 Tell me this is not an amazing sight. I just need Sigourney Weaver to complete the cast of Aliens. So I've had mushrooms in my worm bin in the past, but I waa blown away by a picture sent by one of my past customers. This sees like a full blown infestation. And so he's wondering if the worms are still alive. I am betting they are. Mushrooms and worms like the same environment so if the mushrooms are growing like crazy, so too should the worms. It also shows that there's plenty of nourishment for everybody. Once the carbon supply declines (thank you for helping with the decomposition dear mushrooms), the mushrooms should disappear. So there shouldn't be any competition for food with the worms. If those are alien mushrooms, all bets are off.
 Thursday, June 09, 2011
Outdoor Vermicompost Pit
Well there's not a lot going on in the garden lately. Most of my herbs are half dead again. I think it's because of the rainy season. I also have a few worms left since most have been sold.
Anyway, I still have my outdoor "systems". Although I don't have pictures, I'll try to describe what I saw the other day. The pit where there was once a banana tree continues to impress me. The contents have mostly been converted into vermicompost already. What's amazing too is that all the banana trees in that clump died weeks ago. But the other day, I saw two absolutely beautiful banana shoots. They look really healthy. I wondering now whether the worms had something to do with that.
As for the hole I dug nearby, it's been filled to the brim and I now see evidence of worm action. There's vermicompost on top and when I remove the plastic bag covers, I see worms on top. It took awhile but the pit now looks active.
Interestingly enough, I also see the telltale signs of worm activity all around the backyard. The soil looks cultivated even though you know you had nothing to do with it. I'm not sure how else to describe it. To test, I dig under those. More often than not, I do find worms. I guess it helps that there's a lot of organic material on the soil. It allows the composting worms to thrive.
That's it for now. Until next time.
Anyway, I still have my outdoor "systems". Although I don't have pictures, I'll try to describe what I saw the other day. The pit where there was once a banana tree continues to impress me. The contents have mostly been converted into vermicompost already. What's amazing too is that all the banana trees in that clump died weeks ago. But the other day, I saw two absolutely beautiful banana shoots. They look really healthy. I wondering now whether the worms had something to do with that.
As for the hole I dug nearby, it's been filled to the brim and I now see evidence of worm action. There's vermicompost on top and when I remove the plastic bag covers, I see worms on top. It took awhile but the pit now looks active.
Interestingly enough, I also see the telltale signs of worm activity all around the backyard. The soil looks cultivated even though you know you had nothing to do with it. I'm not sure how else to describe it. To test, I dig under those. More often than not, I do find worms. I guess it helps that there's a lot of organic material on the soil. It allows the composting worms to thrive.
That's it for now. Until next time.
Friday, June 03, 2011
A Tale of Two Rosemary Plants
A few months ago, I tried to take advantage of the summer heat by taking stem cuttings from my rosemary plant. That mother plant's health has been on the decline ever since I purchased it. It was only a full year later that I was able to take stem cuttings and even then I wasn't sure if the cuttings would root. But as I've written before, the cuttings survived. Today, this is how the plants look. The mother plant is almost dead, but the clone, planted in pure vermicast, looks spectacular. Good thing I managed to steal some cuttings before the mother plant passed on to rosemary heaven.

Tuesday, May 17, 2011
Kitchen Scraps Mulch - Update 4
It's been a few months since I put kitchen scraps as reverse mulch (bottom of the pot) under my habanero. Then I put a couple of African Nightcrawlers along with the scraps. I wanted to see if the ANCs would survive in the pot and turn the organic content inside the pot into vermicompost. A couple of days ago, I decided to dig up the pot to see. Compare it for yourself.
If you look at pictures 1 and 2, that's show's a month's difference. In particular, examine the amount of additional mulch on the top side of the plant. While picture 1 shows the pot filled to the brim with mulch picture 2 shows about an inch and a half decline. Considering that I throw in additional material several times a week, you'll appreciate how fast the organic material degrades. Was it due to the worms? Perhaps.


If you look at pictures 1 and 2, that's show's a month's difference. In particular, examine the amount of additional mulch on the top side of the plant. While picture 1 shows the pot filled to the brim with mulch picture 2 shows about an inch and a half decline. Considering that I throw in additional material several times a week, you'll appreciate how fast the organic material degrades. Was it due to the worms? Perhaps.


If you compare pictures 3 and 4, you'll see a big difference as well. Whereas picture 3 has a whole newspaper on the underside covered by a week's worth of kitchen scraps, picture 4 shows mostly humus and some worms. Now the inside of the pot wasn't exactly crawling with worms as I had hoped, but there were still some there. However, I've also seen that the worms migrated to some of the other pots beside my habanero as well. That's why I have cardboard and newspaper under the pots so that the worms can easily move from a bad spot to a good spot and always have something to eat. I think this also goes to show that if you plan it right, composting worms can survive and thrive in the sunny side of the garden.


Wednesday, May 04, 2011
Growing Melons in my Flow Through Worm Bin - Terminated Experiment
I've been eating a lot of melons the past few months and I've been feeding my African Nightcrawlers a lot of melon rinds. I've also been throwing lots of melon seeds in my various worm bins. Because of this, a lot of seedlings have been growing in my worm bins. So I figured maybe I'll try growing these melons to term in one of my flow through worm bins.
It's been going great too. I was wondering what to do if the roots grow through the bottom of the tray so I decided to put the tray on an aquarium with lots of paper, food and of course, worms.
Today, I've decided to terminate the experiment. Why? I looked at the aquarium earlier. It was disgusting. I even saw a cockroach! Eek. There was too much water flowing through the bin and into the aquarium...murky water. I decided to just move the seedlings into a 5-gallon container instead. I'll just add more material every few days. There are still worms in there anyway. I just hope they don't bake since the container is out under the sun.
As for the aquarium, I did what other vermicomposter would do. I added dry shredded paper all the way to the top of the aquarium. I'll stop adding material for a few months. I'll check back in a few months (hopefully it dries up before the rainy season.
It's been going great too. I was wondering what to do if the roots grow through the bottom of the tray so I decided to put the tray on an aquarium with lots of paper, food and of course, worms.
Today, I've decided to terminate the experiment. Why? I looked at the aquarium earlier. It was disgusting. I even saw a cockroach! Eek. There was too much water flowing through the bin and into the aquarium...murky water. I decided to just move the seedlings into a 5-gallon container instead. I'll just add more material every few days. There are still worms in there anyway. I just hope they don't bake since the container is out under the sun.
As for the aquarium, I did what other vermicomposter would do. I added dry shredded paper all the way to the top of the aquarium. I'll stop adding material for a few months. I'll check back in a few months (hopefully it dries up before the rainy season.
Tuesday, April 26, 2011
Why You Need A Worm Bin...
I recently replenished my supply of African Nightcrawlers because a lot of my bins were bought the past couple of weeks. That said, I didn't have a lot of bins lying around so I just put my worms in a pail. They were pretty dense inside that pail. And so the past two days have been quite challenging. They've been crawling out like crazy, even with the lights on. For the past two nights, it's been like an episode of Fear Factor. But the ones I placed in a few bins didn't attempt to crawl out. What's in the new bins? I stole some old bedding from my established worm bins and voila, I had worm friendly bins. I guess this experience underscores the advantage of getting an established worm bin as against buying worms and waiting for them to get comfortable inside the new bin.
Monday, April 18, 2011
Swiss Mint - Boom and Bust Cycle

My swiss mint is now a year old! But it's not any bigger. In fact, it's now smaller. Let me explain. Initially the mint grew really well. Look how big the leaves were. I even managed to prune it several times and grow new plants from cuttings. I think most of those died months later. The mother plant survived though, but barely.
 I'm not really sure why but the stems became spindly. The plant started losing it's leaves and the new leaves that grew were small and a little rusty. Still the plant survived. Although, it's been sunny the past two months, the swiss mint still didn't recover completely. So I decided to change the soil completely. I figured maybe that would help.
  Since I had some extra vermicompost left from my various bins, I replaced the soil with vermicompost. A few weeks later, my swiss mint looks small but well on its way to recovery. Once again the stems are fat and the leaves are big. I even have an accidental melon growing in the middle. I think this is actually the most dramatic impact of vermicompost that I've seen among the many times I've used themf for my plants. Will the swiss mint recover for good or is it just teasing me? We'll see in a couple of months.
 By the way, my newly recovered chocolate mint is dying again. I'll talk about that next time.
Sunday, April 17, 2011
Growing Melons in my Flow Through Worm Bin
 I've been eating a lot of melons lately since my worms like the rinds. So now I have more than enough seeds than I'm prepared to deal with. So a lot of times, I just throw the seeds in with the rinds inside my worm bins. In my flow through try, I've had dozens of melon seedlings sprouting at the same time. Since the contents of the bin are almost fully processed anyway, I figured I would just grow the melons. As you can see though, the tray is quite shallow. So how can I grow big melon plants from here? For one, I'm using pure vermicompost so I'm hoping the roots get their nourishment without a problem. The tray also has holes in the bottom. You can't see it very clearly, but there's a covered aquarium underneath. If roots grow through the tray, they can anchor inside the aquarium. The aquarium is filled with paper and coffee grounds and of course a couple of worms. You get the idea, right? In a month or so, I'll see if it works. But what happened to the worms? They're still there. However, I made the materials in the aquarium high enough so that they touch the bottom of the tray. The tray gets some sunshine so if it gets too hot, the worms can crawl down the aquarium. So far, the worms are alive. My problem though is that the contents of the tray keep dipping since worms tend to poop underneath the tray. To help keep the tray contents up, I just add shredded paper and coffee grounds regularly. Once the melon plants grow bigger, I'll tie a couple of straws from the gate to the tray for that trellis effect. Watch out for it!
 Thursday, April 14, 2011
Big Melons One More Time
As I mentioned in one of my recent posts, I'm trying to grow melons again. To increase my chances, I am growing from four different pots. I have a couple of seedlings growing in my worm tray. From a week and a half ago, the seedlings have actually dwindled as expected. I would expect a few more to die out. I am thinking I'll be able to grow three full sized melons from that tray. Too small? I'll show you next time why I don't think it's too small.
 Then there's the melon that's growing from one of my plant boxes. The cool thing is that it's bigger now and that it's starting to climb. I repositioned the box so that the melon plant is nearer the metal bars. I also put part of the box in the shade since I put a couple of worms there, along with some organic material. I figure that should help the melon in it's growth spurt.
 I also have a couple of melons bunched with other plants. In this pot, you'd see dozens of seedlings along with the growing melon. Those are tomatoes. I also throw their seeds around a lot. Like melons, I've had no luck growing tomatoes. Always so close, yet so far.
  Finally, here's another picture. I think it's growing solo in a pot. It's also starting to climb the metal bars. To compensate for the relatively small containers, I'll just try to water and feed the plants more. I hope that's a logical solution. We'll see in a few weeks.
 Then there's the melon that's growing from one of my plant boxes. The cool thing is that it's bigger now and that it's starting to climb. I repositioned the box so that the melon plant is nearer the metal bars. I also put part of the box in the shade since I put a couple of worms there, along with some organic material. I figure that should help the melon in it's growth spurt.
  I also have a couple of melons bunched with other plants. In this pot, you'd see dozens of seedlings along with the growing melon. Those are tomatoes. I also throw their seeds around a lot. Like melons, I've had no luck growing tomatoes. Always so close, yet so far.
  Finally, here's another picture. I think it's growing solo in a pot. It's also starting to climb the metal bars. To compensate for the relatively small containers, I'll just try to water and feed the plants more. I hope that's a logical solution. We'll see in a few weeks.
And if you're wondering why I have so many melons seeds (I do), that's because my diet is now partially dictated by my worms. Worms love melons! Therefore I love big melons!
Saturday, April 09, 2011
Outdoor "Container" Vermicomposting Adventures
You would often read that composting worms thrive best in a contained environment, away from the elements. Since my back porch is really small, I am limited in terms of the number of containers I can use. So today, I'll show you a couple of outdoor experiments (outside my mom's house without her knowledge...hehe). Well more accurately, I'll show you the containers I've been using. I checked each one earlier so I'm sure worms are alive and working in all of those "containers".
 A couple of months ago, I was repotting a plant and I inadvertently cracked the pot. To keep using the pot, I buried it under the soil and tried growing a couple of herbs there. Unfortunately, I think the spot was too shaded and whatever I planted kept dying. So I just used it as a vermicomposting pot. If you look at the picture, you can even see the crack. The pot has no real cover. I just use some pieces of plastic and a smaller pot as paperweight. I've put most of my nastier waste there (from a vermicomposting standpoint), including onions and garlic. As of last check, the 6-8 worms I put in have survived. A few new ones have even hatched although I must say population has not exploded.

Wednesday, April 06, 2011
Herb Garden Updates
Summer is a great time for plants! Most of my herbs are doing a lot better than they did 6 months ago. Of course I have to be more dutiful in terms of watering (sometimes twice a day) but it's worth it. Let me show you a couple of my favorite plants.
Look at the before and after photos of my chocolate mint. There's a two month difference between these photos but look how lush the plant has become. I added vermicompost into this pot and moved it to the sunniest location in the garden. What did the trick? I'm honestly not sure. All I know is that I've been nursing this plant since November and I'm glad it looks like the day I bought it (lush and vibrant). Oh dear I have to greet my mint happy birthday. It's over a year old now. And for those would be gardeners, don't believe everything that you read. My mints have shown no inclination in taking over the garden counter to what I frequently read back then. I tried planting the mints on the ground several times, but they never thrived.


Look at the before and after photos of my chocolate mint. There's a two month difference between these photos but look how lush the plant has become. I added vermicompost into this pot and moved it to the sunniest location in the garden. What did the trick? I'm honestly not sure. All I know is that I've been nursing this plant since November and I'm glad it looks like the day I bought it (lush and vibrant). Oh dear I have to greet my mint happy birthday. It's over a year old now. And for those would be gardeners, don't believe everything that you read. My mints have shown no inclination in taking over the garden counter to what I frequently read back then. I tried planting the mints on the ground several times, but they never thrived.


Saturday, April 02, 2011
Vermicompost Flow Through Tray Update: Vermicomposting in the Philippines
 Today I want to provide an update on my vermicomposting flow through trays. The tray is pretty full and the contents I would guess are about 80% processed. In my case, that's good enough to use. So what did I do? Well, I wanted to remove the worms from the tray but I don't want to sort through the contents since there's a lot of material there. What I did instead was to put another tray on top of it with a good number of wet cardboard and paper. At the bottom of the upper tray, I also put in a watermelon rind and a couple of banana peels just to entice the worms.
  Two days later, I found worms already hanging at the bottom of the upper tray. Migration has begun. Earlier when I was looking, I also found lots of worms on the upper part of the lower tray. Yey! At least I know vertical migration works.
A couple of entries ago, I also talked about seeds germinating in my worm bin. I took this picture earlier. It's just getting silly. There must be dozens of seedlings in my tray. They're probably mostly melons. I'm not sure what to do with the tray. Should I harvest the vermicompost or should I just let the worms migrate for another day or two and then use the tray as a seedling bed? Never mind that I'll leave a couple of worms there. That should be good for the seedlings
right?
Wednesday, March 30, 2011
Moisture Level in Your Worm Bin: Vermicomposting in the Philippines
Today I'll talk a little more about worm bin moisture. What is the proper level of moisture? How can you tell? What happens if the moisture level is off?
I've been vermicomposting for about seven months now. It doesn't seem like a long time, but I have seen a good number of bin conditions. I've had content worms and restless worms. Let me share a couple of things I've observed over the months.
I had a small bin before that was really wet. The contents were minimal but water puddled at the lower end (the floor was slightly tilted I guess). Guess where the worms stayed? They stayed in the wettest part of the bin. That tells me that worms are not averse to moisture per se. I also have a big aquarium that has some leftover water. It's flooded but I do have paper sticking out about 5-6 inches above water. The worms are thriving in that aquarium. In both bins, worms didn't try to escape.
So is excess moisture always good? Let me answer it this way. I also have a couple of bins with excess moisture where worms escape on a daily basis. The difference I believe is the amount of content. In the bins where worms tried to escape, I had hundreds of worms inside aside from being packed to the brim with lots of paper. My best guess is that in these bins, the packed paper combined with the excess moisture limited airflow within the bin.
So how should you manage the moisture content in your worm bin? The fuller the worm bin, the less moisture you're allowed, especially if the contents pack together. You need a few holes for bins with limited content; you need a few dozen more for bins with more content. Check the sides and the lid for moisture. If there's condensation, you can either add some dry bedding or leave the lid off (but keep the lights on). In my case, I add dry bedding, leave the lid off in the daytime and I turn the contents to keep the contents from packing together.
These days, I hardly even add water. The food I put in is usually enough to keep the contents wet. Sure the top dries out and I get worried. But when I check the bottom, the vermicompost is usually not fluffy. That means it's still wet. I just turn the contents. Since I have small bins too, I sometimes turn the bins upside down so the moisture goes down to the dry contents. I wonder if my worms get dizzy when I do that.
A cool thing I've also discovered is that I add dry whole paper just below the lid so there's a paper filter between the bin and the lid. It discourages the worms from crawling out because they'd have to crawl through dry paper. It also helps absorb excess moisture. How do I know? Even if the piece of paper doesn't touch the contents, it'll be soft due to moisture by morning.
That's it for now. I've already said a mouthful. Happy worming!
I've been vermicomposting for about seven months now. It doesn't seem like a long time, but I have seen a good number of bin conditions. I've had content worms and restless worms. Let me share a couple of things I've observed over the months.
I had a small bin before that was really wet. The contents were minimal but water puddled at the lower end (the floor was slightly tilted I guess). Guess where the worms stayed? They stayed in the wettest part of the bin. That tells me that worms are not averse to moisture per se. I also have a big aquarium that has some leftover water. It's flooded but I do have paper sticking out about 5-6 inches above water. The worms are thriving in that aquarium. In both bins, worms didn't try to escape.
So is excess moisture always good? Let me answer it this way. I also have a couple of bins with excess moisture where worms escape on a daily basis. The difference I believe is the amount of content. In the bins where worms tried to escape, I had hundreds of worms inside aside from being packed to the brim with lots of paper. My best guess is that in these bins, the packed paper combined with the excess moisture limited airflow within the bin.
So how should you manage the moisture content in your worm bin? The fuller the worm bin, the less moisture you're allowed, especially if the contents pack together. You need a few holes for bins with limited content; you need a few dozen more for bins with more content. Check the sides and the lid for moisture. If there's condensation, you can either add some dry bedding or leave the lid off (but keep the lights on). In my case, I add dry bedding, leave the lid off in the daytime and I turn the contents to keep the contents from packing together.
These days, I hardly even add water. The food I put in is usually enough to keep the contents wet. Sure the top dries out and I get worried. But when I check the bottom, the vermicompost is usually not fluffy. That means it's still wet. I just turn the contents. Since I have small bins too, I sometimes turn the bins upside down so the moisture goes down to the dry contents. I wonder if my worms get dizzy when I do that.
A cool thing I've also discovered is that I add dry whole paper just below the lid so there's a paper filter between the bin and the lid. It discourages the worms from crawling out because they'd have to crawl through dry paper. It also helps absorb excess moisture. How do I know? Even if the piece of paper doesn't touch the contents, it'll be soft due to moisture by morning.
That's it for now. I've already said a mouthful. Happy worming!
Monday, March 28, 2011
Everything Germinates in the Worm Bin Experiment Results: Worm Bin Adventures in the Philippines
Guess what? The Indian Mango Seed did not germinate within the required period. At least the worms did not run away from the tray. As for the various seeds, mostly melons and watermelons, a lot germinated but a lot didn't as well. I still got about a dozen sprouts, which isn't a bad deal. I don't know what a chico seedling looks like so I'm not sure if the seed germinated. It is worth noting though that while a lot of seedlings sprouted, most of them died after 2-3 days, including the carrot top that sprouted. Could it be the lack of sunshine? Perhaps.
Wednesday, March 23, 2011
Kitchen Scraps Mulch - Update 3
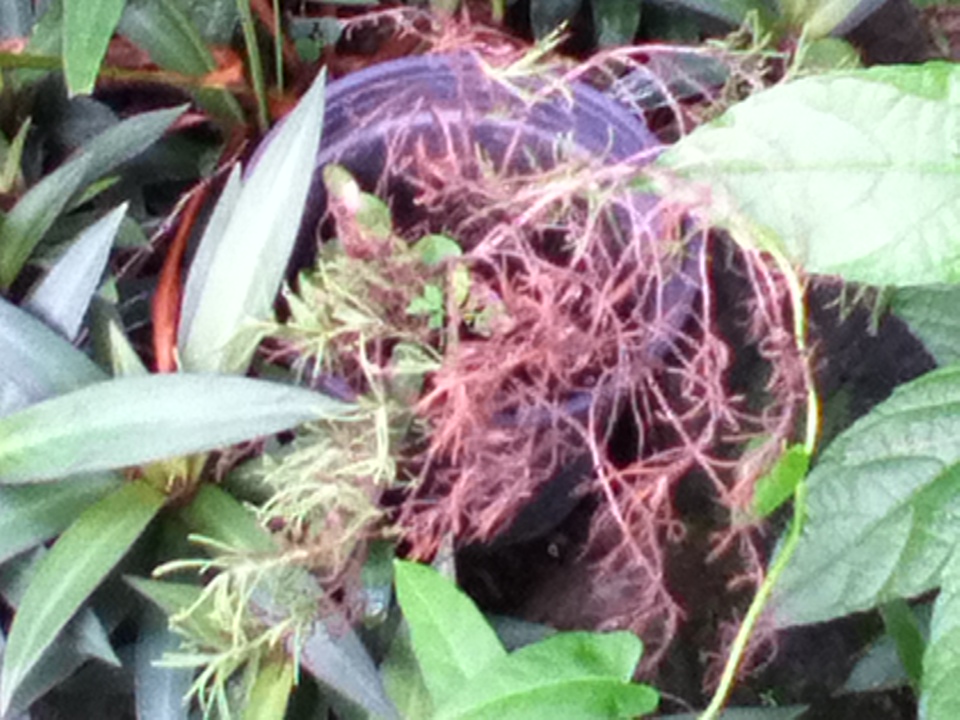
It's been almost two months since I put African Nightcrawlers inside a pot while I was trying below-the-soil-mulch. The experiment was conducted with my habanero as participant. Here's my two-month worth of experience conclusion: African Nightcrawlers can thrive inside a pot (about 14 inches) for at least two months. In my last post, I indicated that I saw vermicompost on the ground below the pot. That means the worms were pooping at the bottom. Not yet convinced?
 Earlier, temperatures reached a punishing 33 degrees. Summer is here! Since the habanero likes full sunlight, the pot is out in a sunny spot in the garden. My initial worry was that worms will not survive the heat. Earlier though I saw them. When I lifted the pot earlier (about 3 PM), the worms were all below the pot. There must have been at least a dozen of them there (adults and babies). If I remember correctly, I must have put in about half of those. The rest must be due to reproduction.
  As for the habanero, well it's doing fine. The chili peppers are big but still unripe. However, the whole vermicompost thing has not really resulted in plentiful, green leaves. In fact, in at least three plants, I've had some yellowing of leaves while using pure vermicompost. I am thinking that my worms' general diet has been too low on nitrogen, therefore resulting in fairly low nitrogen vermicompost. So I just top dressed the habanero's leaf mulch with coffee grounds to give the plant that green pep.
That's it for now. Until next time.
 Earlier, temperatures reached a punishing 33 degrees. Summer is here! Since the habanero likes full sunlight, the pot is out in a sunny spot in the garden. My initial worry was that worms will not survive the heat. Earlier though I saw them. When I lifted the pot earlier (about 3 PM), the worms were all below the pot. There must have been at least a dozen of them there (adults and babies). If I remember correctly, I must have put in about half of those. The rest must be due to reproduction.
 But why below the pot? It's the first time I've seen that. First of all, there was cardboard below the pot. They must think it's a good place to hang out while the scorching sun was creating a burning environment within the pot. Even for African Nightcrawlers 33 degrees is much too hot I would guess.
 As for the habanero, well it's doing fine. The chili peppers are big but still unripe. However, the whole vermicompost thing has not really resulted in plentiful, green leaves. In fact, in at least three plants, I've had some yellowing of leaves while using pure vermicompost. I am thinking that my worms' general diet has been too low on nitrogen, therefore resulting in fairly low nitrogen vermicompost. So I just top dressed the habanero's leaf mulch with coffee grounds to give the plant that green pep.
 That's it for now. Until next time.
Subscribe to:
Posts (Atom)


